(updated) How to fix leaking Phoenix Gold amplifier capacitors
I have received many questions about Phoenix Gold capacitors leaking, and I have replaced them on many amplifiers for myself and for others. The procedure to replace them is not all that hard, but requires basic soldering skills, and some patience. I use Nichicon UHE1C562MHD6 capacitors for nearly all my replacements. You can buy them online from Digikey with the part number 493-1543-ND (link). If you cannot find them for some reason, just ask, I will be glad to help (dr.fosgate@gmail.com). These capacitors work in the following amplifier model lines, M, MS, MPS, ZX, and ZPA. They may work in others as well.
This procedure is for replacing the input filter capacitors to the amplifier, not the power supply output or "rail" capacitors. Replacing rail caps is much harder, and it is actually pretty easy to damage an otherwise fine amplifier if you make a mistake. I have worked on a lot of amps over the past several years, and have only seen one or two bad rail caps. These bad rail caps were damaged due to abuse, not age. Unless you are certain your amp has bad rail caps, I strongly suggest against replacing them. Right now about 50% of the repair work I have been doing on Phoenix Gold amplifiers is fixing additional damage caused from people unsuccessfully replacing their rail caps.
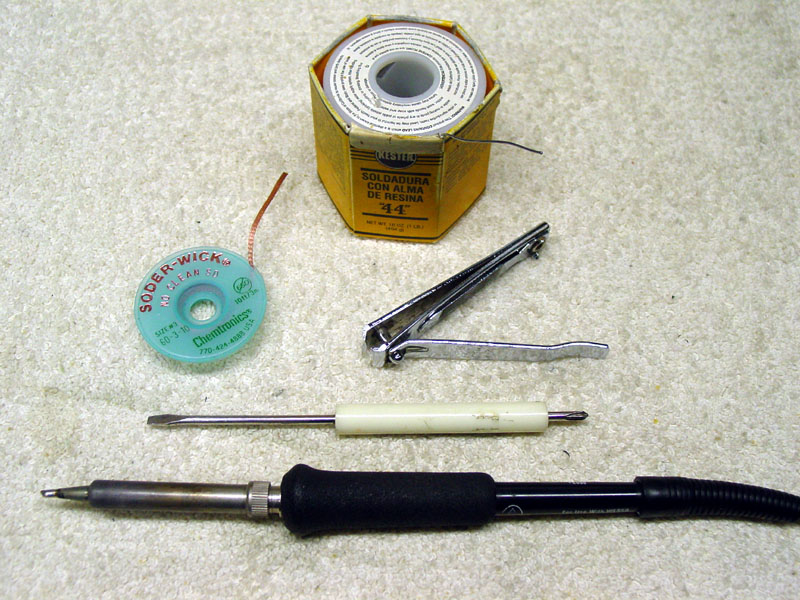
To replace the capacitors, you need a few simple tools shown below... (plus a few more I show in later photos)
I use Kester "44" solder. Solder wick should be around one eighth inch width. You will need a small blade screwdriver, and something to clip the leads on the new capacitors. I have flush cut nippers, but they were at work, so I chose nail clippers which will work just as well. I also use tweezers to remove leads and Q-tips with lacquer thinner for cleaning.
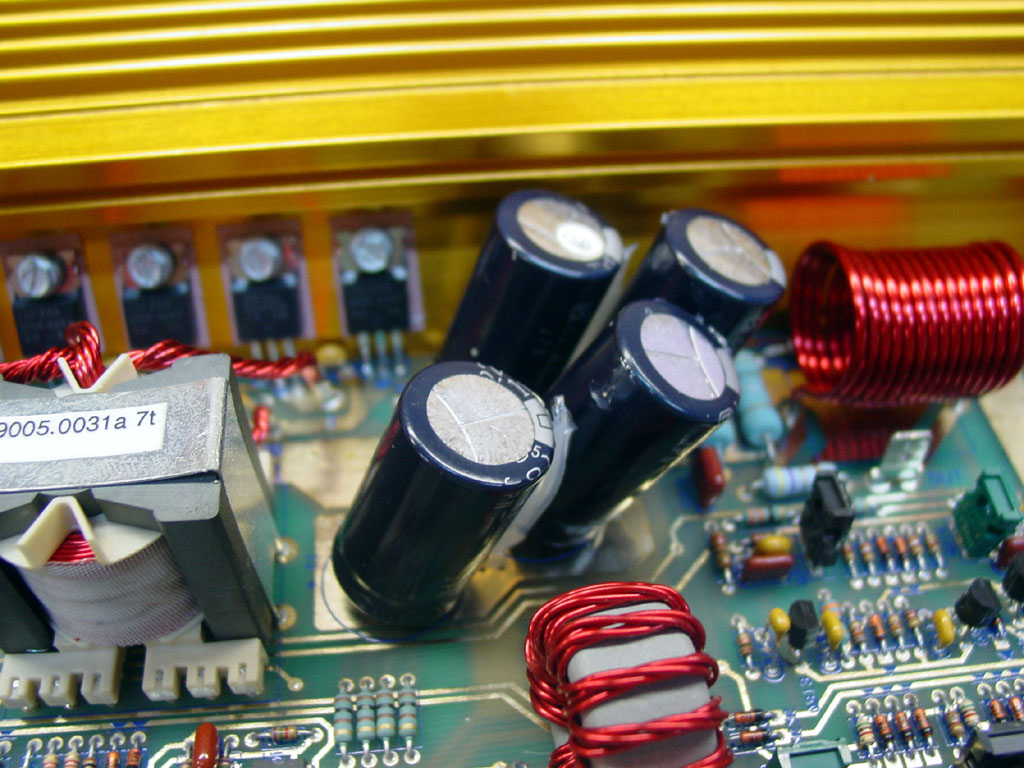
For this tutorial I used an M44 I had on hand.
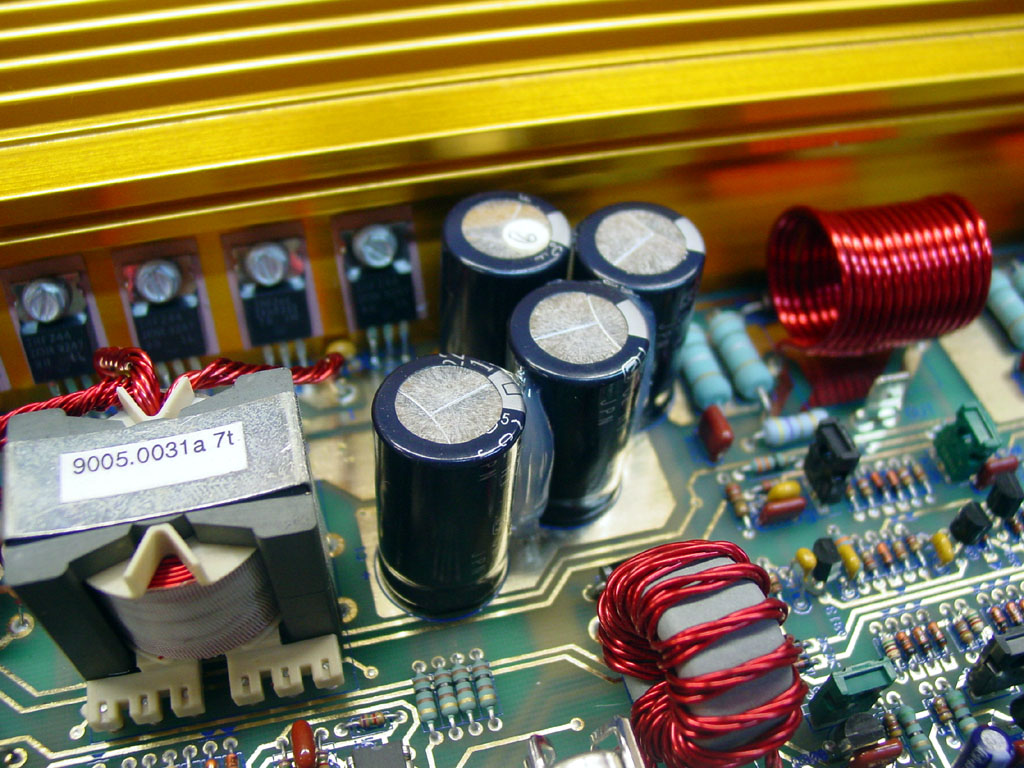
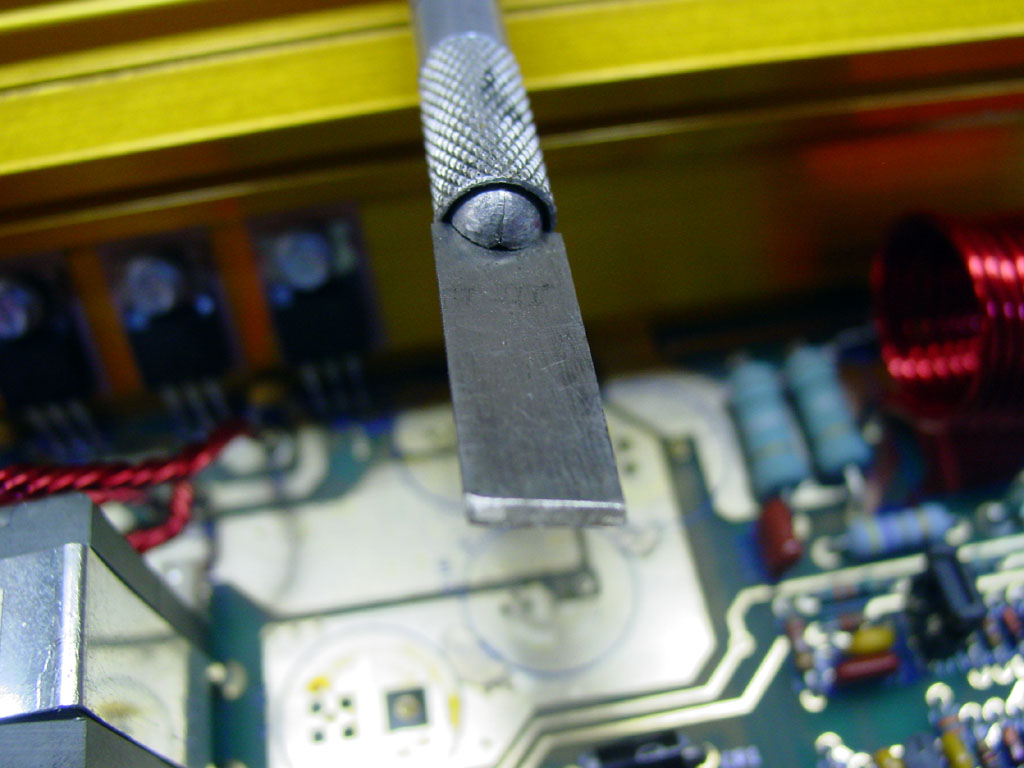
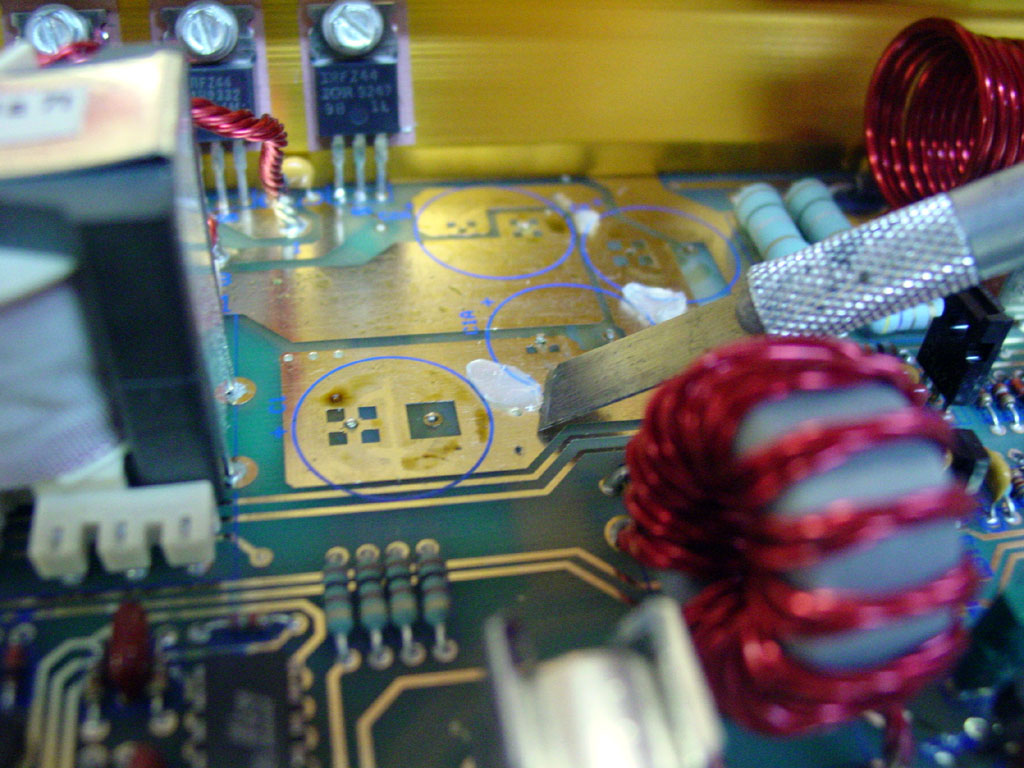
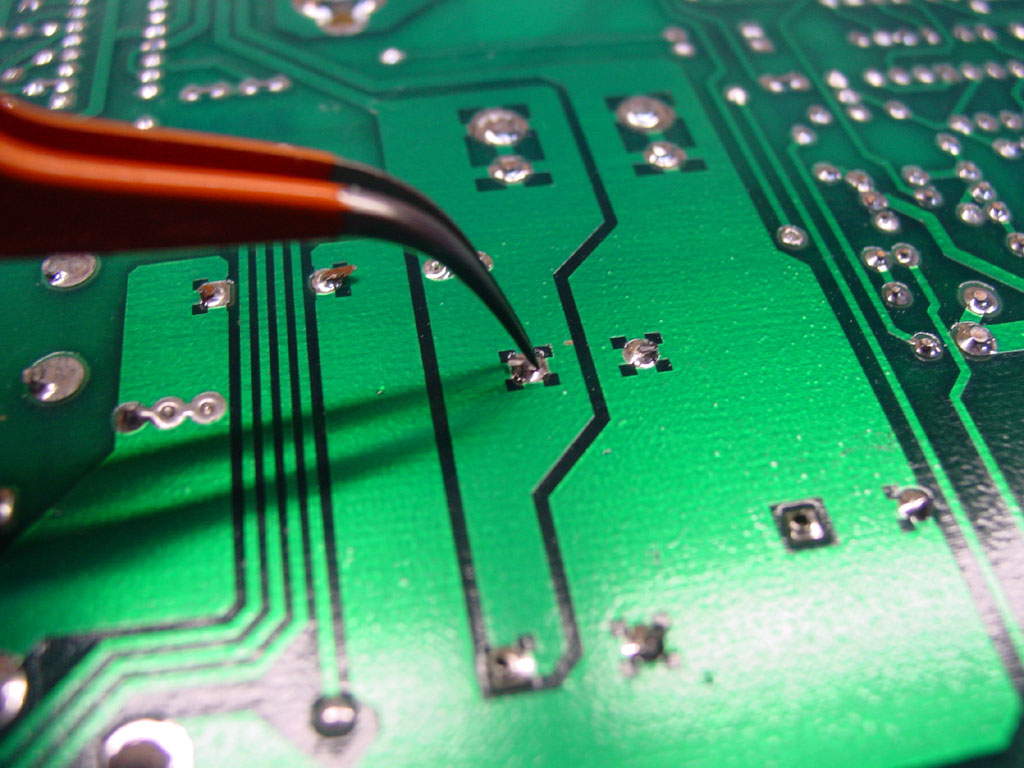
The first step is to break the capacitors free from each other. To do this I use a blade screwdriver and shove it between the caps gently.
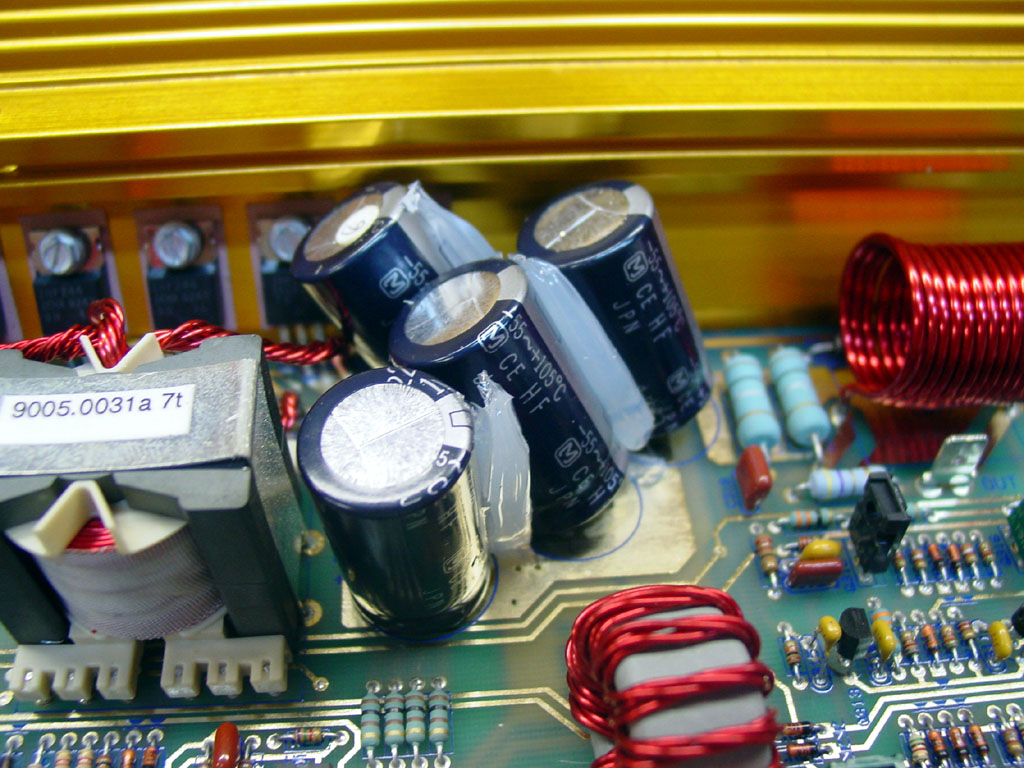
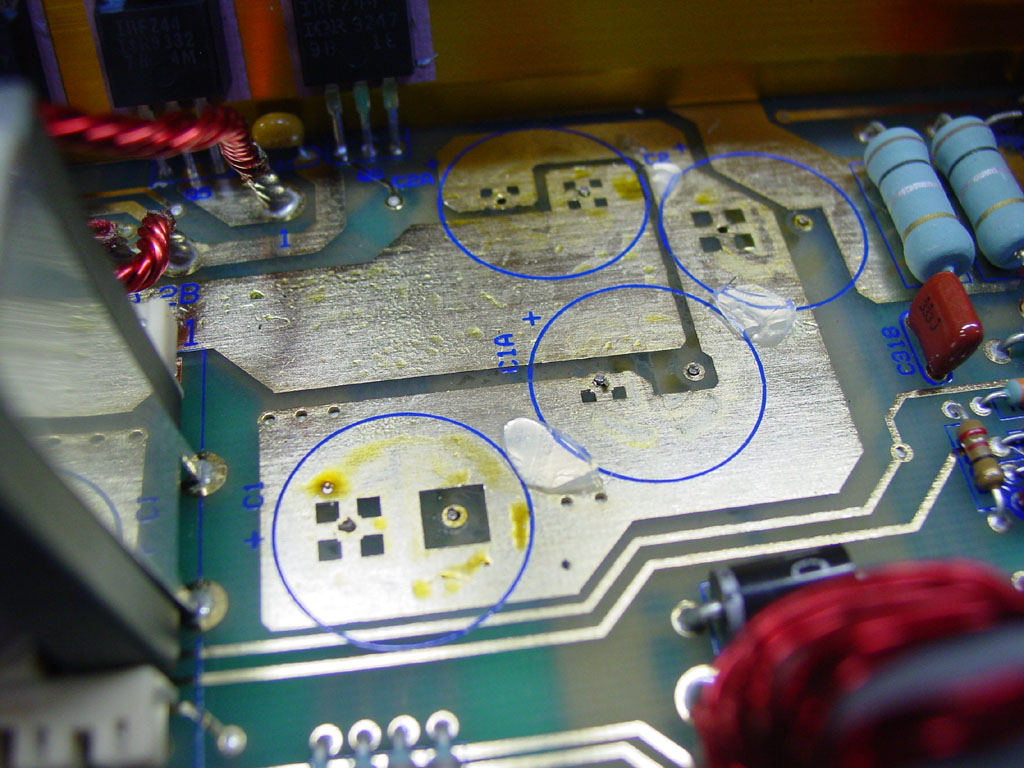
Here all the silicone caulk is broken free.
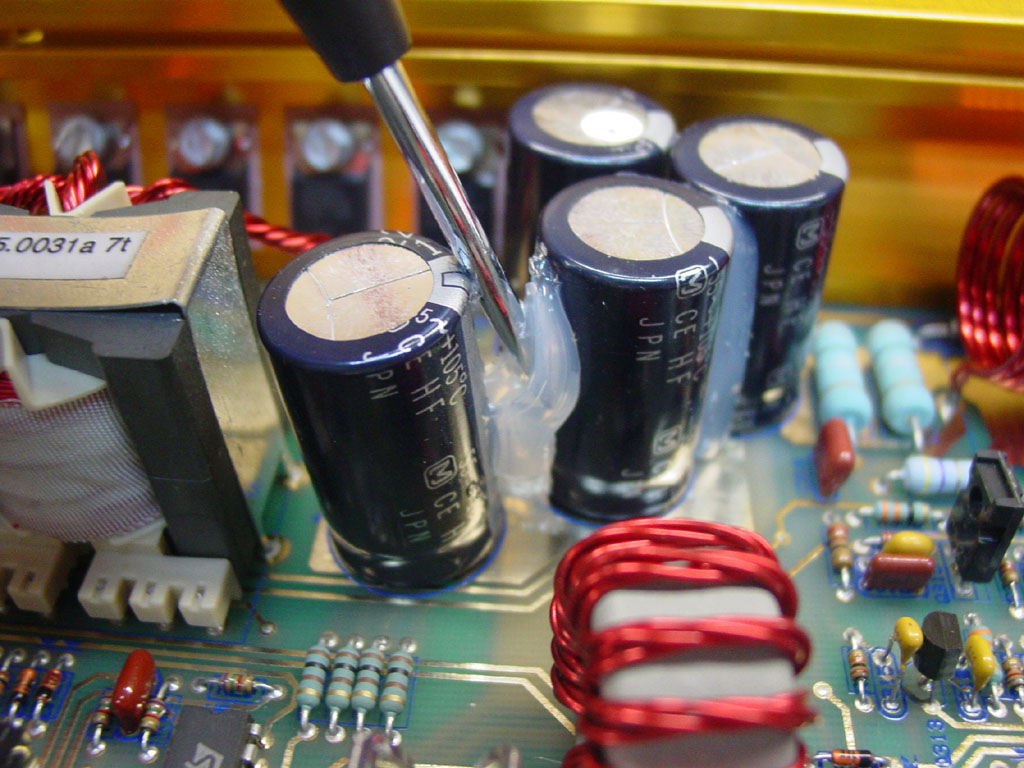
Next, use your fingers to force the capacitors to one side. Notice I am forcing them in the direction of the (-) lead. This forces the (+) side of the cap to lift up off the board, and its lead should remain in place.
Then push them back in the other direction. The (+) leads will shove back up in the cap, and this time the (-) will slide out free.
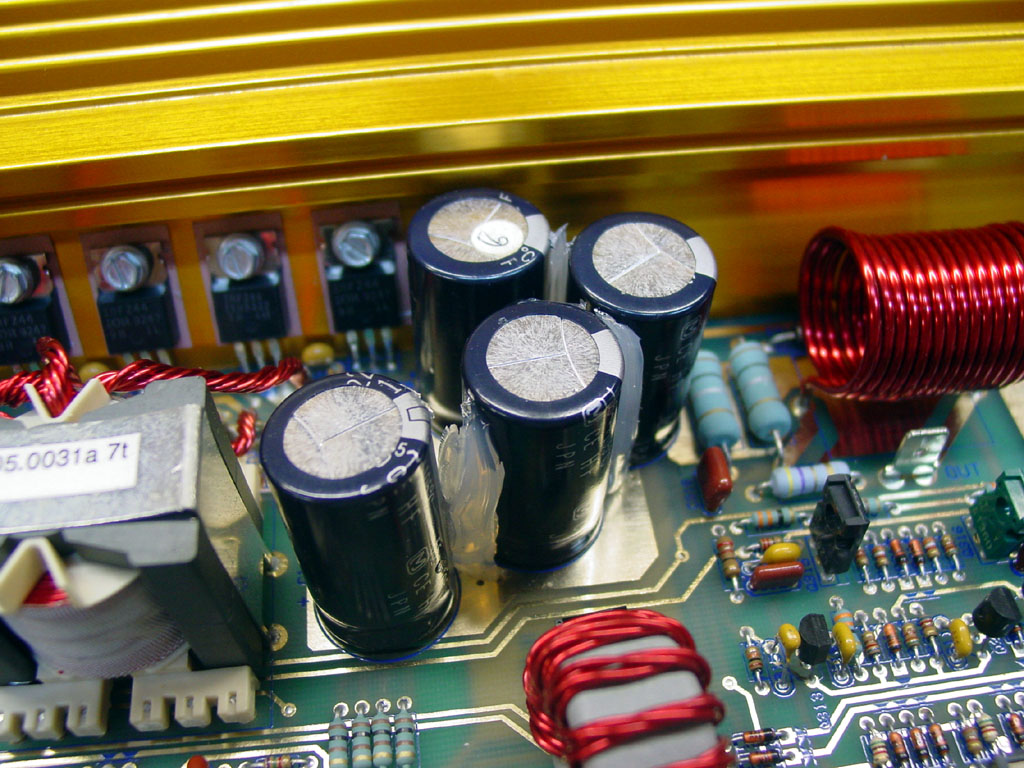
Now you need to pull straight up with even pressure. You just need your fingers for this, no tools. The caps should pull up and leave their leads behind.

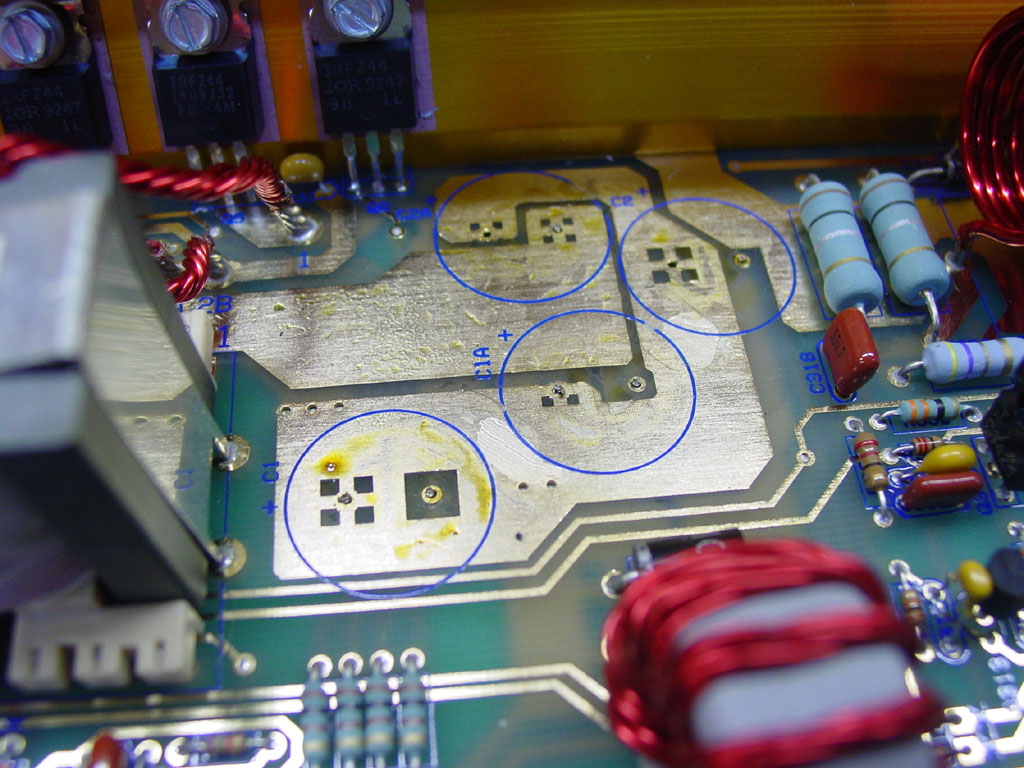
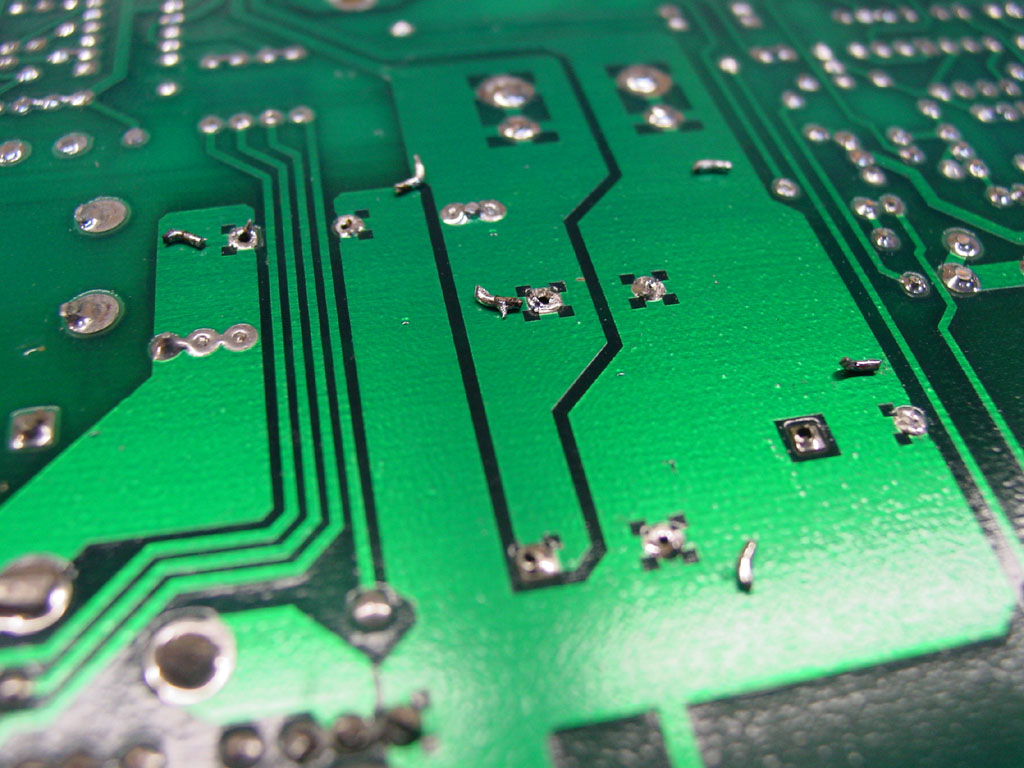
Here all the caps are gone, and only their leads remain. Notice a few broke off or pulled out from the board. This is more common with the M series. I have seen a lot less break off on the other PG amps. The M series amps have much smaller solder pads on the bottom, so there is less solder to hold onto the cap's leads. Also notice the fluid which was on the board under the caps. Although this amp looked pretty good from the top, the caps were leaking, and not too far from catching fire.
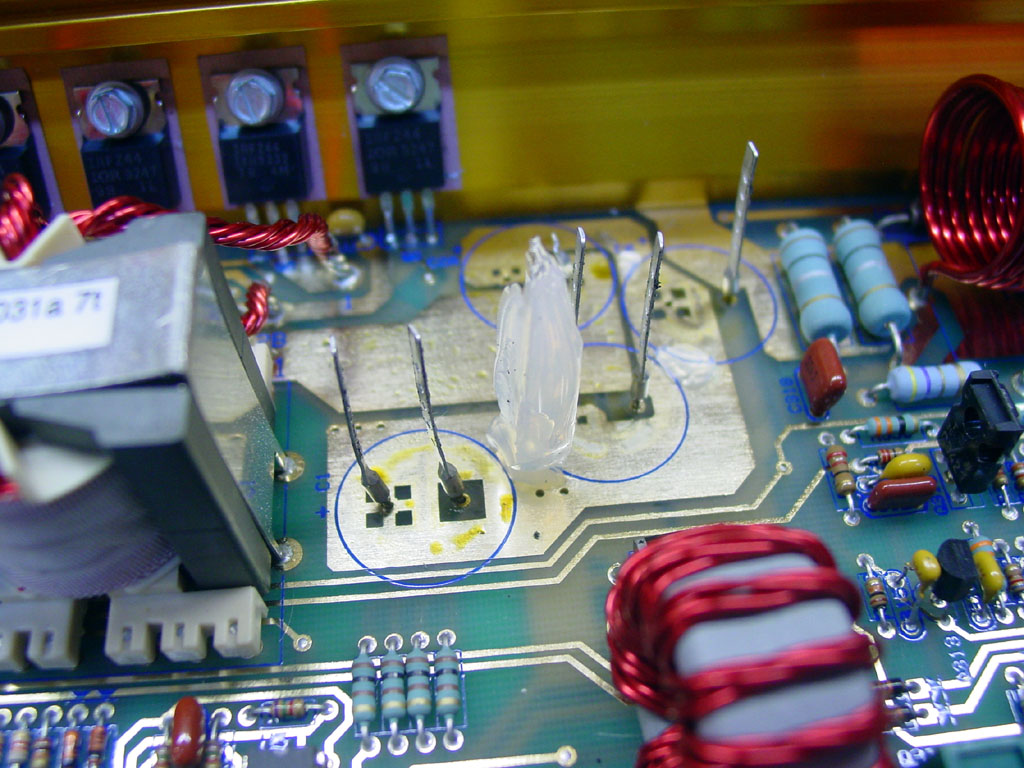
I now use some flush cut nippers to clip the leads close to the board, and clip off any extra silicone caulk.
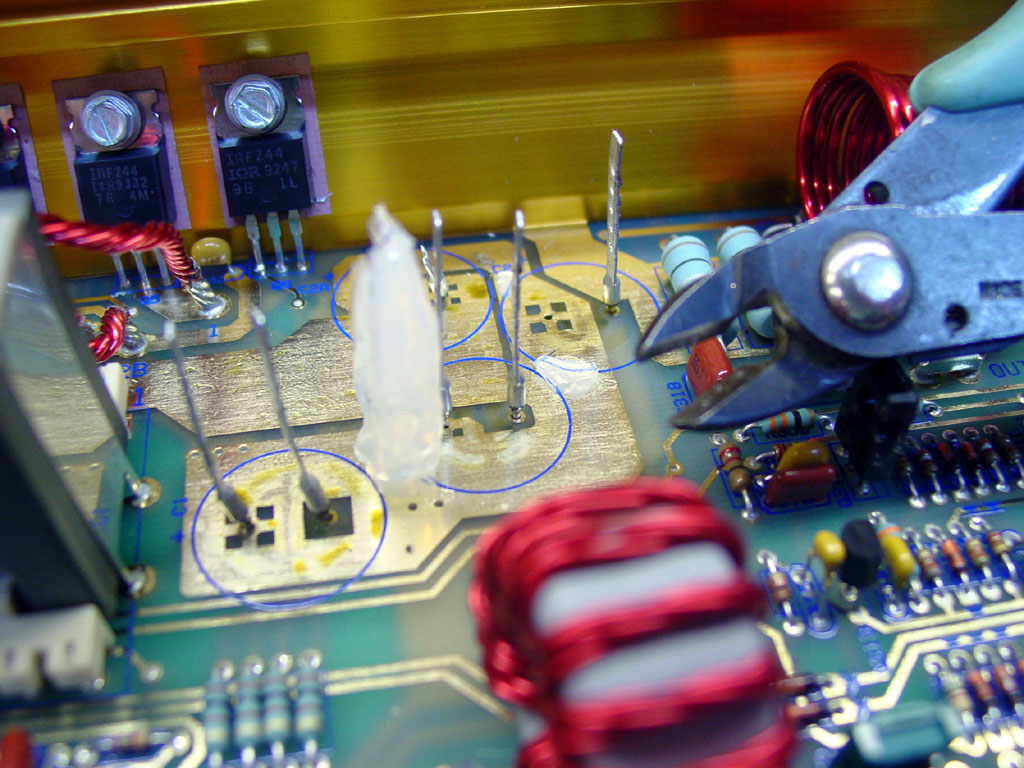
Here the board is ready to be cleaned up more.
I use a straight blade in an X-acto knife to cut off the excess silicone caulk.
This is very easy to do and requires little force. If you damage your board you are doing something wrong.
.
For now we are done on the top. Now we need to move on to the bottom.
Here is the bottom of the board prior to doing anything.

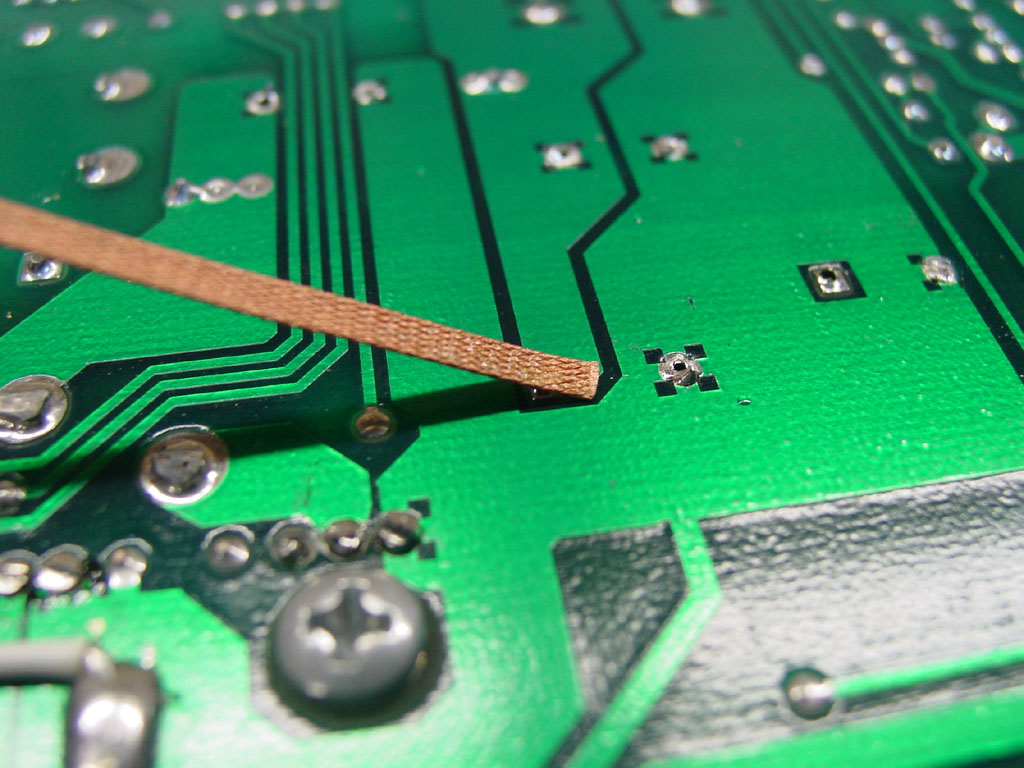
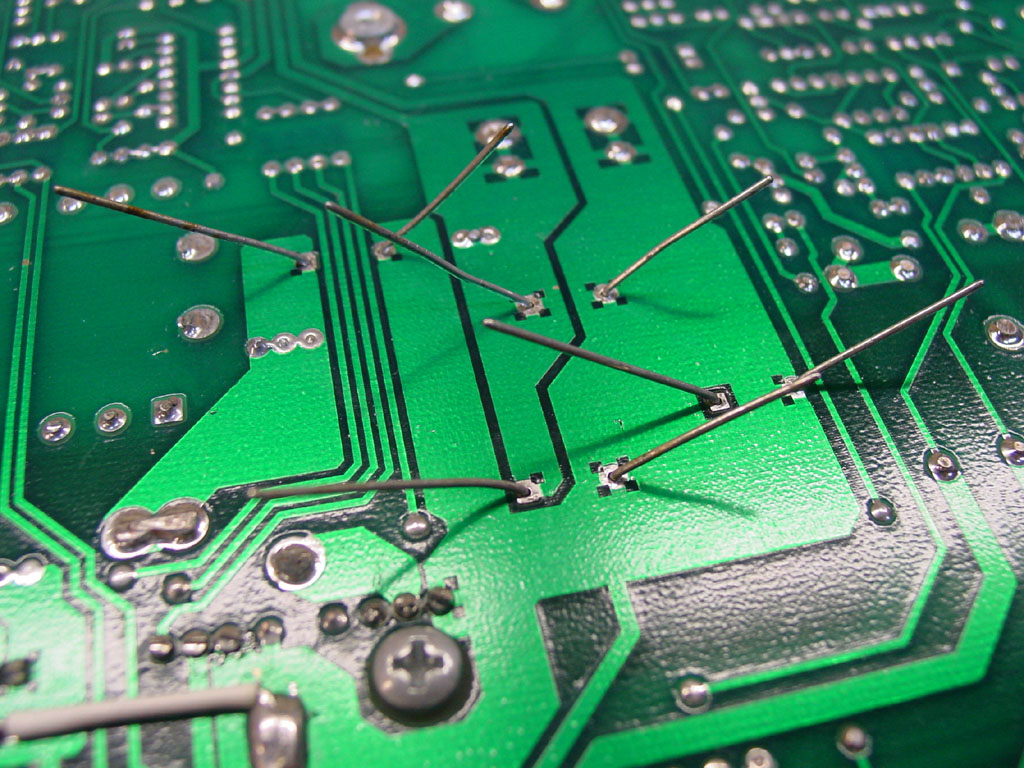
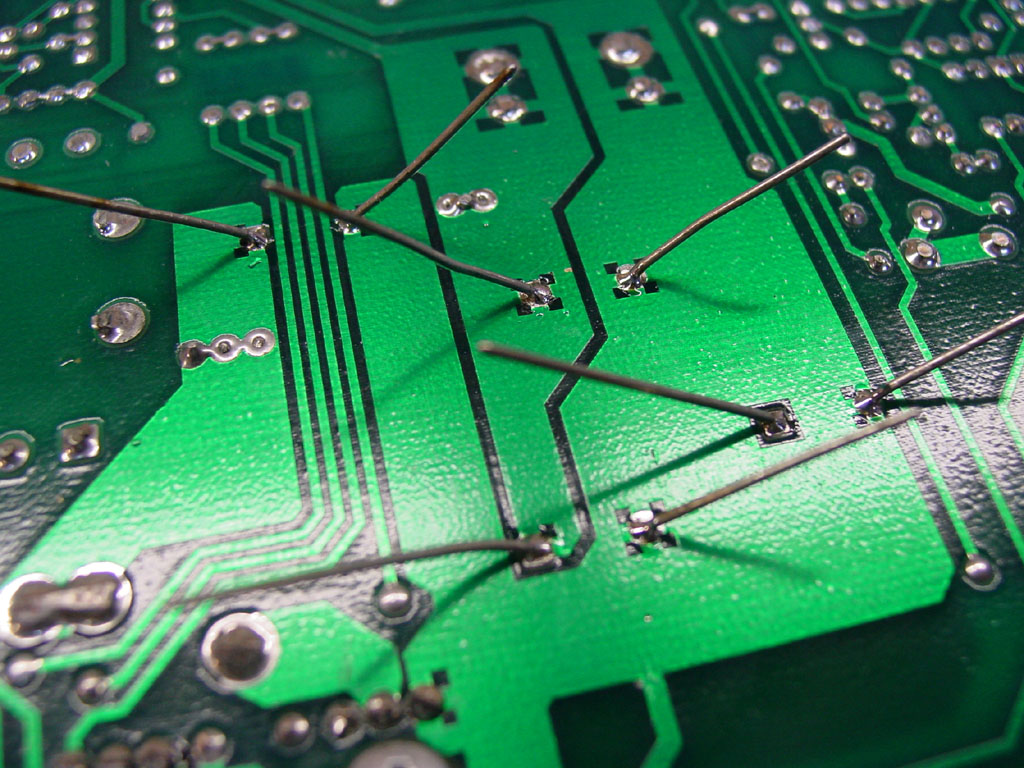
I use tweezers and my soldering iron (one in each hand) to heat and pull the leads out from the bottom. This is very easy, and does the least amount of damage to the board of any method I have tried. Another advantage is no solder is left in the via, so you don't need to use a solder sucker, or risk overheating and damaging the board more trying to get a stubborn glob of solder out.
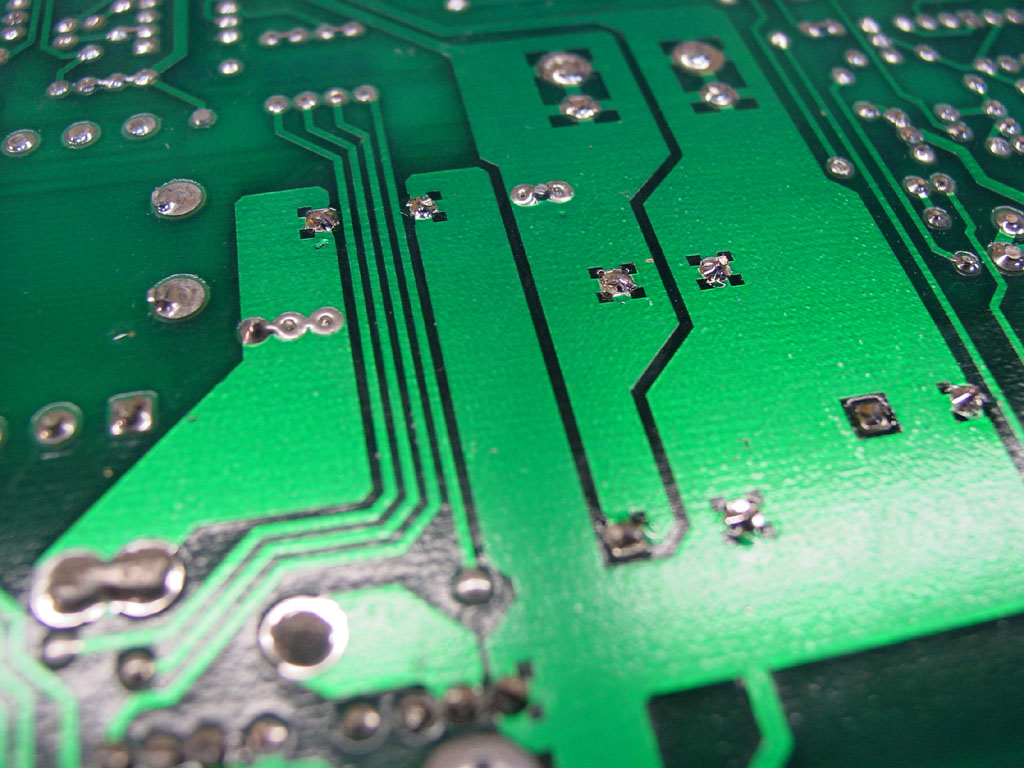
Here all the leads are out.
I now use a bit of solder wick to clean up the excess solder left behind. Don't apply too much heat in this step. Just get the solder off there and call it good.
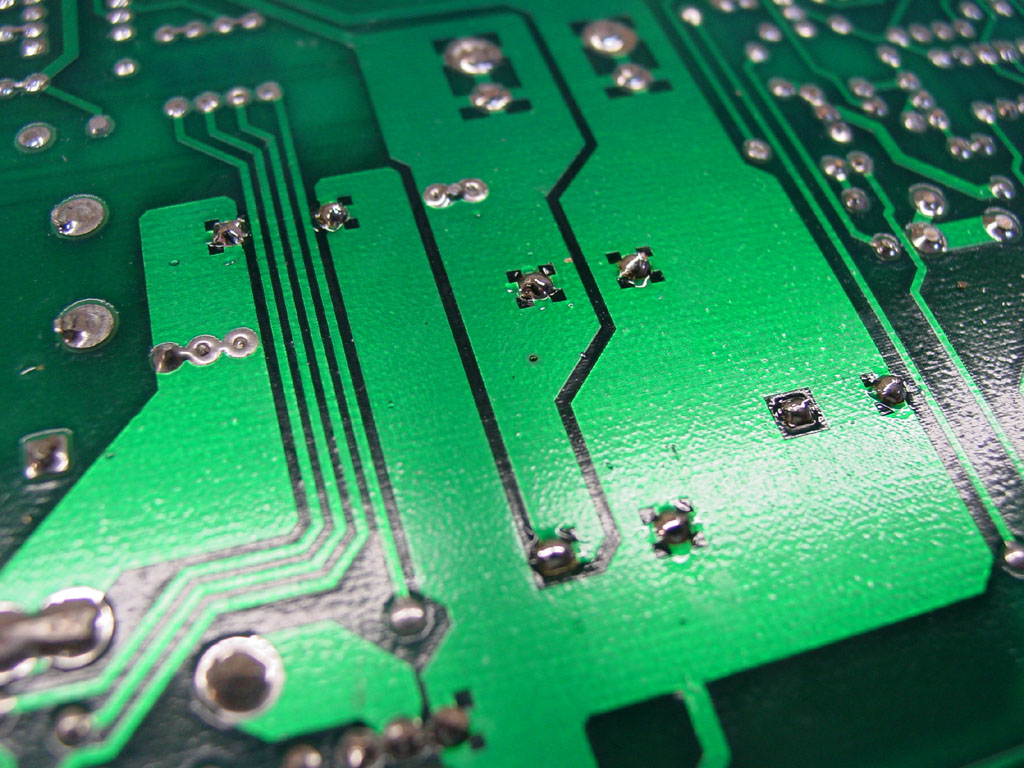
The solder is now gone and the holes are empty. At this point you can take a new capacitor and stick one of its leads in each hole to verify there is nothing blocking them.
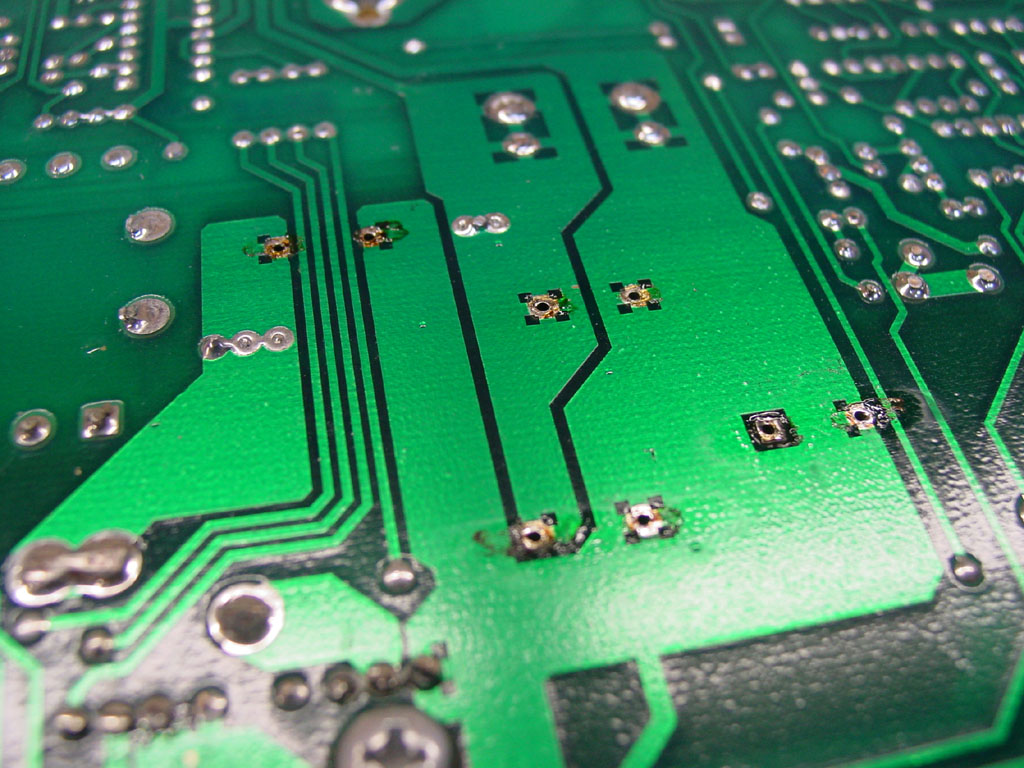
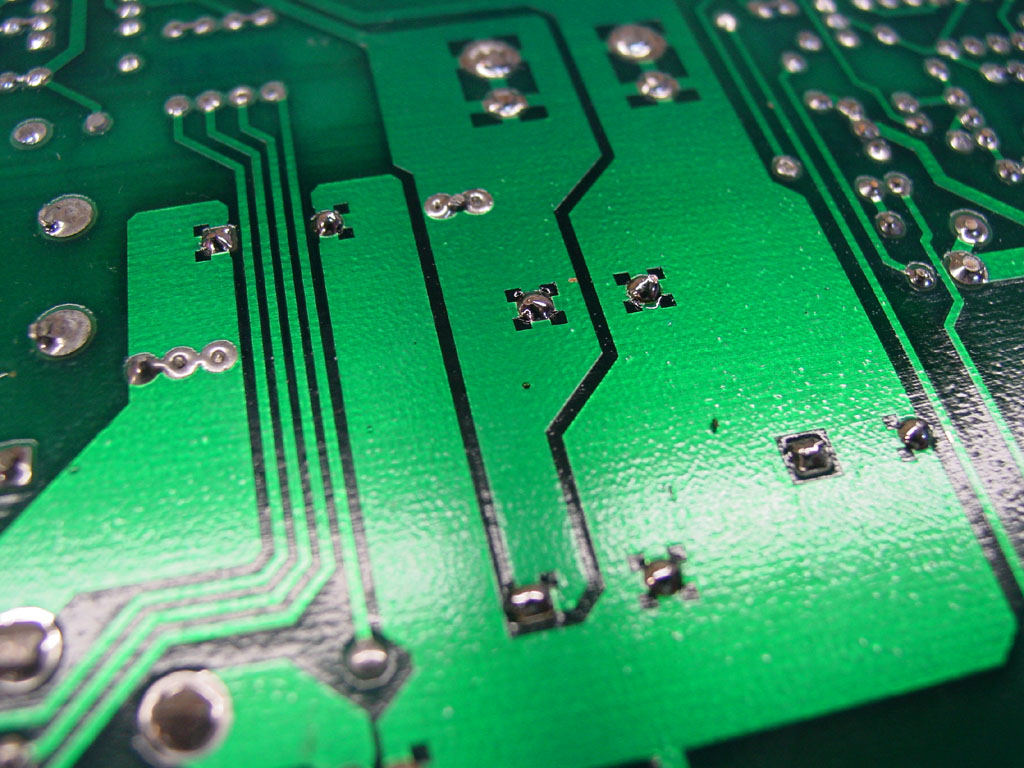
I use a Q-tip with lacquer thinner to clean off any solder flux left behind.
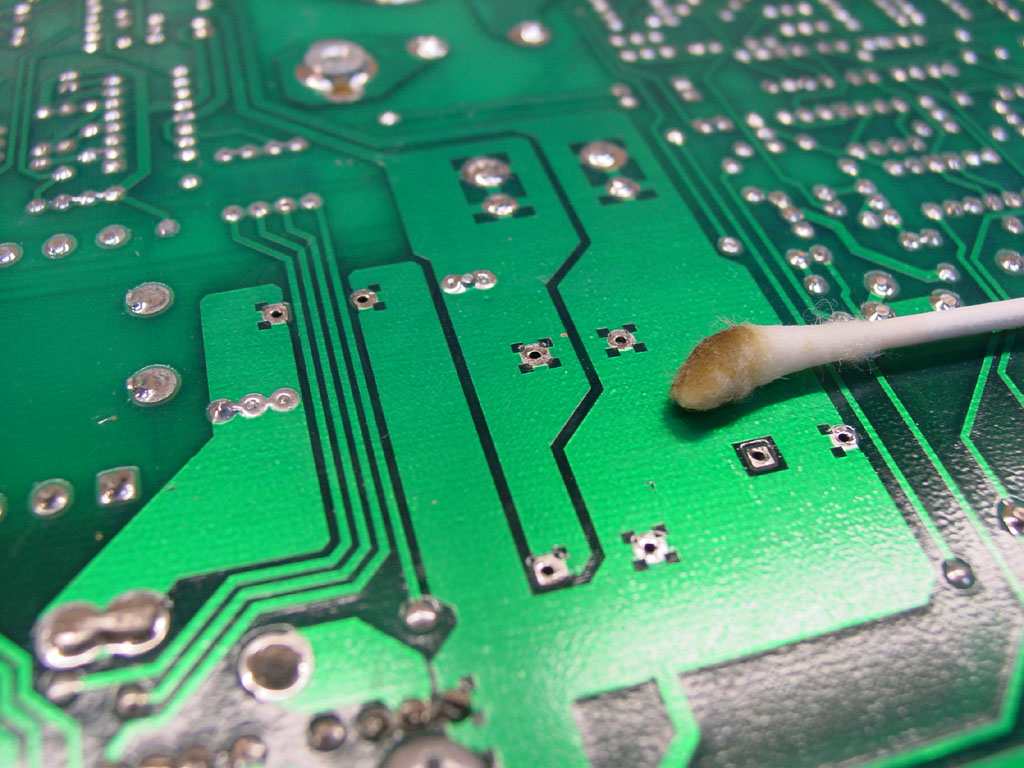
Now you can flip the board over and clean up the top with the Q-tip and lacquer as well. Once clean it looks nearly as good as new.
Install the new caps, be sure to get the polarity correct.
I bend the leads at a slight angle to hold them in place. Some people don't care for this idea as it places stress on the capacitor. I have not had an issue with this, but I don't force them much. Just enough to keep the cap down flat to the board on the other side is all I do.
I use just a tiny bit of solder initially.
Then I clip the extra lead length off.
Now I go back and add more solder with a bit more time on the iron as well to let the solder flow down into the via.
Lastly I clean off all the extra flux with a Q-tip and more lacquer thinner.
At this point, if your amp had caulk holding the capacitors together, you could re apply caulk in the same locations as before. This will keep the caps from vibrating in an installation and working their leads out, or breaking off. I don't do this much at all anymore. Most MS, and MPS, along with ZPA amps don't use caulk on their caps. I see little need to use it on the other models. If you plan to mount your amp to a box, then you may need the caulk to keep the caps from breaking off due to vibration. However if you mount your amp to your box, any of the other parts on it could just as easily vibrate and break off as well, so I don't see what your gain will be.
I also suggest against using silicone under the caps to hold them in place. This will seal them so they cannot leak, or so you cannot tell they are leaking. If the caps start to go bad they will internally short and catch fire. At least with them leaking from the bottom you have a chance to notice it and fix the issue before it gets out of hand.
November 2011